
E-SKIMO LAUNCH EDITION USER MANUAL
REV. 1.1
 |
E-SKIMO LAUNCH EDITION USER MANUAL |
| I. Introduction | 4 |
| Disclaimer | 4 |
| Safety Instructions | 4 |
| II. Product Components | 8 |
| In The Box | 8 |
| Product Overview | 10 |
| III. First-time use | 14 |
| Prepare the product | 14 |
| IV. Operation | 16 |
| Uphill Configuration | 16 |
| Power On/Off the E-SKIMO | 18 |
| Activate the E-SKIMO | 19 |
| Operation Instruction | 21 |
| Batteries Instructions | 22 |
| Downhill Configuration | 25 |
| V. E-SKIMO Management | 27 |
| Transporting the E-SKIMO | 27 |
| E-SKIMO APP | 28 |
| VI. Regular Maintenance | 36 |
| Ski base waxing | 36 |
| Cleaning | 36 |
| VII. Storage and Disposal | 37 |
| Storage | 37 |
| Disposal | 37 |
| VIII. Troubleshooting | 38 |
| Troubleshooting Guide | 38 |
| IX. Compliance and Legal | 38 |
| General informations | 38 |
Download the E-SKIMO app
I. Introduction
Disclaimer
Before using the E-SKIMO, please read and fully understand this manual and all related documentation. After reading, keep this manual in a safe place for future reference. Improper use of the E-SKIMO could cause serious injury to yourself or others, or damage the skis, batteries, motor, or other property. By using the E-SKIMO, you acknowledge that you have understood and accepted all terms and instructions in this manual and agree to take responsibility for your actions and any consequences that may result. The manufacturer is not liable for any damages or injuries resulting from failure to follow the safety instructions and guidelines in this manual.
Safety Instructions
Recreational Use Only
E-SKIMO is designed for assisted ski touring and outdoor recreation. It is not intended for other sports, professional work, or situations beyond recreational skiing.
Balance and Safety
E-SKIMO cannot prevent falls or maintain balance. If you have mobility or balance issues, or are not confident on skis, do not use this E-SKIMO.
High-Risk Situations
Do not rely on E-SKIMO in situations where E-SKIMO failure could cause serious injury, death, or severe environmental damage.
Plan Your Ski Tour Carefully
Terrain, weather, and personal fitness all affect safety. Always plan your route, bring proper gear, and follow standard ski touring precautions. It is strongly recommended to undertake ski touring with experienced guides.
Use Only as Intended
E-SKIMO is only for assisted ski touring. Do not use it for snowboarding, ski jumping, or other activities not officially verified.
To reduce injury risks, please read and follow all “CAUTION”, “WARNING” and “NOTICE”s in this manual:
 |
Failure to follow the instructions might result in severe personal injury. |

|
Failure to follow this instruction might result in malfunction, damage to the product, or slight personal injury. |
 |
Indicate important information or tips, but not related to personal injury. |

|
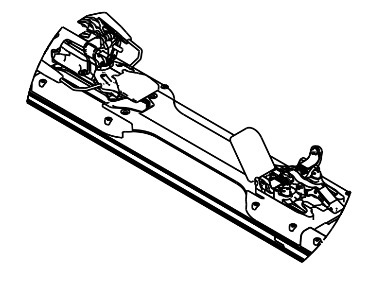
Do not grab, pull, or lift the ski by the boot sensor. Always handle the E-SKIMO by the bindings or the ski itself. |
 |
Follow this manual carefully before using E-SKIMO in any outdoor environment, especially in areas with potential hazards. |

|
Children under 18 must are not allowed to use E-SKIMO |

|
Who Should Not Use E-SKIMO
|

|
E-SKIMO contains components and radios that emit electromagnetic fields. These may interfere with pacemakers, defibrillators, or other medical E-SKIMOs. Consult your physician before using E-SKIMO if you rely on such E-SKIMOs.
|

|
Stop Using the E-SKIMO Immediately If:
|
II. Product Components
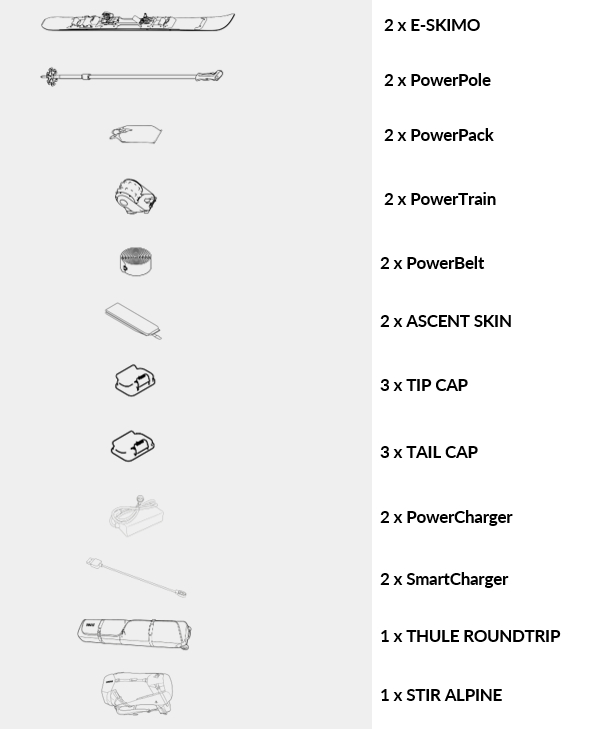
In The Box
Product Overview
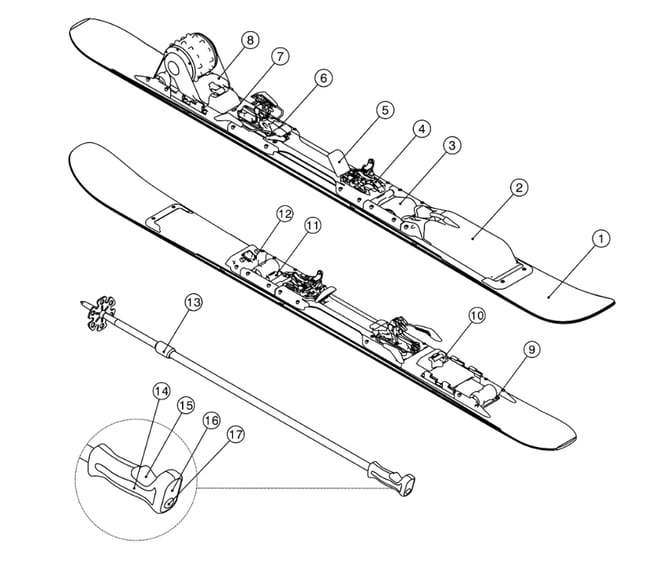
Diagram
Specifications (per 1 E-SKIMO)
|
Product |
E-SKIMO Launch Edition |
|
General |
|
|
Model |
ESK-LCH-V1 |
|
Dimensions |
173 x 15 x 17 cm |
|
Downhill Weight |
3.5 kg |
|
Uphill Weight |
6.7 Kg |
|
Power Output |
720 W |
|
Maximum Torque |
15 Nm |
|
Range |
Up to 4 hours |
|
Operation Modes |
ECO, CLIMB, BOOST |
|
Protection Level |
IP54 |
|
Ski |
|
|
Manufacturer |
Blizzard Ski |
|
Length |
173 cm |
|
Sidecut (mm) |
145-112-134 |
|
Turn radius |
19 m |
|
Profile |
All Mountain Rocker |
|
Binding |
|
|
Manufacturer |
ATK |
|
Product |
RENT ME 12 EVO |
|
Boot Sole Range |
260mm to 340mm |
|
Power Belt & Ascent Skin |
|
|
Manufacturer |
Pomoca |
|
Product |
E-SKIMO Launch Edition |
|
Power Pack |
|
|
Model |
ESK-PP-V1 |
|
Weight |
1.3 kg |
|
Nominal Voltage |
36 V |
|
Max Charging Voltage |
42 V |
|
Battery Type |
Li-ion |
|
Capacity |
252 Wh |
|
Operation Temperature |
-15 °C to 5 °C 5 °F to 41 °F |
|
Storage Temperature |
0 °C to 40 °C |
|
Charging Temperature |
0 °C to 45 °C 32 °F to 113 °F |
|
Charging Time |
3.5 h |
|
Product |
E-SKIMO Launch Edition |
|
Power Pole |
|
|
Model |
ESK-REM-V1 |
|
Dimensions (minimum) |
7 x 4 x 95 cm |
|
Pole Height Range |
95-140 cm |
|
Weight |
0.3 kg |
|
Battery Type |
Lipo |
|
Capacity |
300 mAh |
|
Operation Temperature |
-15 °C to 5 °C 5 °F to 41 °F |
|
Storage Temperature |
0 °C to 40 °C |
|
Charging Temperature |
0 °C to 45 °C 32 °F to 113 °F |
|
Charging Time |
1.5 h |
III. First-time use
Video tutorial
Updated video tutorials on how to setup your E-SKIMO with latest tips and tricks are available HERE
Prepare the product
Open and remove the package.
- Connect each PowerPack & PowerPole to the supplied chargers to activate them
- For safety during transport, all batteries are shipped in hibernation mode.
Macro binding adjustment
- Your E-SKIMO skis are factory-set to Large mode, suitable for boot sole lengths between 280 mm and 340 mm.
- If your boot sole length is between 260 mm and 280 mm, perform the Heel Binding Macro Adjustment.
Micro binding adjustment
 |
For proper operation, the toe piece should be set as far backward as possible. |
- Please read ATK’s provided manual. The toe piece and heel piece are equipped with adjustment sliders.
- To move the toe piece, press down on the two round buttons and slide the toe piece until the buttons pop up and lock into place.
- To move the heel piece, press forward on the rear slider button and slide the heel piece.
- Insert the boot into the toe pins and slam the boot down into the heel pins.
- Using a 4mm spacer, check that the distance between the boot and the heel piece is correct.
Binding release adjustment
- Using a DIN chart, find your DIN release values.
- Using a Phillips screwdriver, turn the rear DIN screw until the desired DIN value is reached.

|
Make sure the PowerPack is not connected to the ski when assembling the E-SKIMO. If the powertrain is connected while the PowerPack is attached, it may be permanently damaged or, if accidentally activated, could cause serious harm to people and property. |
Uphill Configuration

|
The correct sequence for Uphill Configuration is critical. You must follow the steps in the exact order specified to ensure the E-SKIMO is configured safely and correctly for ascent. |
Remove Tip & Tail Caps
- Hold the E-SKIMO upright, with the tail resting on the ground.
- Push on the Tip & Tail caps to remove them from the E-SKIMO.
- Secure the Tip & Tail caps in your backpack.
Install Ascent Skin
- Unfold the Ascent Skin and hold it from the tip attachment.
- Hold the E-SKIMO upright, with the tail resting on the ground.
- Install the Ascent Skin’s tip attachment on the E-SKIMO.
- Lay the Ascent Skin over the surface of the E-SKIMO, making sure edges are exposed.
Install PowerTrain
- Lay the E-SKIMO on the ground.
- Open the PowerTrain’s latch.
- Lift the Tail cover, rest the PowerTrain onto the E-SKIMO’s rear rails and slide it forward.
- Close the latch onto the E-SKIMO’s catcher.
Install PowerBelt
- Lay the E-SKIMO on the ground.
- Find the black arrow on one of the PowerBelt ends.
- With the hairy side facing the ground, insert the arrow end front to rear between the motor and the latch.
- Feed half of the PowerBelt through.
- Insert the arrow end rear to front between the PowerTrain and the ski.
- Feed the PowerBelt until the arrow end touches the front pulley.
- Insert the arrow end around the front pulley through the ski.
- Insert the other end around the rear pulley through the ski.
- Lay the E-SKIMO on its side.
- Hold each end with your index and thumb and clip them together.
Install PowerPack
- Lay the E-SKIMO on the ground.
- Slide the PowerPack’s pin into the E-SKIMO’s front rail.
- Stretch both PowerPack’s flexible straps over the E-SKIMO’s catchers.
Clipping in
- Lay the E-SKIMO on the ground.
- Rotate the heel piece by a half-turn so the horizontal pins point backwards.
- Open the toe piece by pressing the lever down.
- Slide your boot forward and align the toe pins with the tip of your boot.
- Apply your weight on the toe to clip in.
- Lift the toe lever to lock the binding.
Repeat the steps for the second E-SKIMO and switch your boots to uphill mode.
Power On/Off the E-SKIMO

|
Make sure to connect and disconnect the PowerPack ONLY once the E-SKIMO is fully assembled in uphill configuration. If the PowerTrain is connected after the E-SKIMO is turned on, it may be permanently damaged or, if accidentally activated, could cause serious harm to people and property. |
Power ON the E-SKIMO
- Lift the Tip cover and push down the PowerPack connector.
- The ski LED will turn on.
Power OFF the E-SKIMO
- Lift the PowerPack connector and push down the Tip cover.
- The ski LED will turn off.
Power ON the PowerPole
- Press the power button for 5 seconds.
- The status LEDs will turn on.
Repeat the sequence on both E-SKIMOs and PowerPoles
Power OFF the PowerPole
- PowerPole will power automatically of in case od no user interaction for 5 minutes
Activate the E-SKIMOs
Download the E-SKIMO APP
Option 1: Scan the QR code below to download.
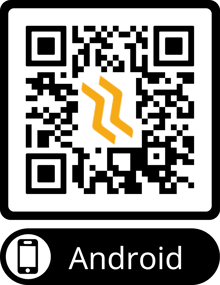
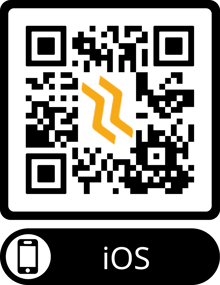
Option 2: Search "E-SKIMO" on Google play or App Store to download.
|
Create an account and complete settings on the APP |
 |

|
It is REQUIRED to register on the E-SKIMO APP and activate the E-SKIMOs through it for the initial setup. |
Make sure that both E-SKIMOs are powered ON before continuing with the next steps
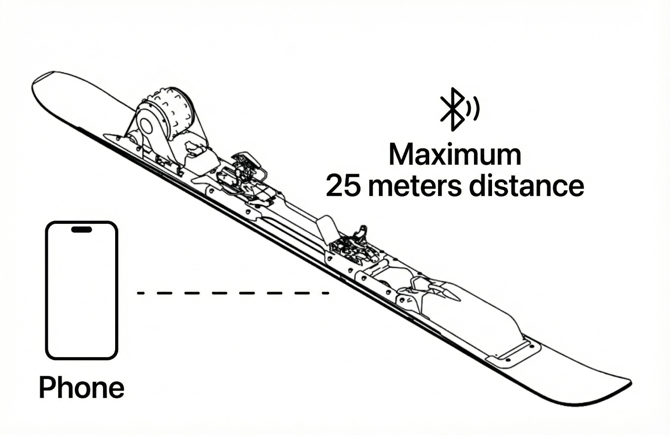
Place your phone near the E-SKIMO, enable Bluetooth on your phone, and, using the app, follow the instruction to pair each E-SKIMO.
Congratulations! Your E-SKIMOs are ready!
Follow the next steps to pair the PowerPoles to your E-SKIMOs
Operation Instruction
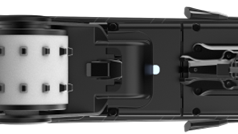
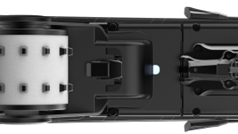
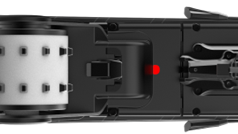
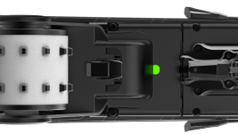
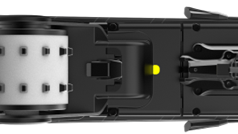
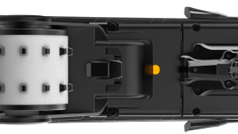
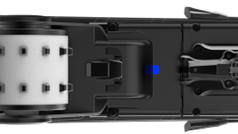
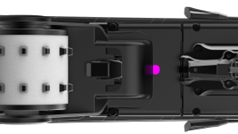
E-SKIMO LED color codes
The E-SKIMO color codes represent a precise system state that can be described as follows.
|
Status |
Status LED |
Image |
Definition |
|
OFF state |
Led is off |
|
E-SKIMO is off. Powerpack not connected |
|
READY state |
Led is steady white |
|
E-SKIMO is ON and ready. The powerpack and motor are connected. PowerPole is disconnected |
|
ALARM state |
Led is blinking white |
|
E-SKIMO is ON but is in error state. The Powerpack is connected but the motor is not. |
|
DISARMED state |
Led is steady red |
|
E-SKIMO is ON and ready. The Powerpack and motor are connected. PowerPole is connected in a disarmed state. |
|
ARMED state |
Led is steady green |
|
E-SKIMO is ON and ready. The Powerpack and motor are connected. The PowerPole is connected in an armed state. |
|
DRIVE mode state |
Led is steady yellow |
|
E-SKIMO is ON and ready. The Powerpack and motor are connected. PowerPole is connected, DRIVE mode is selected. |
|
POWER mode state |
Led is steady orange |
|
E-SKIMO is ON and ready. The Powerpack and motor are connected. PowerPole is connected, POWER mode is selected. |
|
BLE state |
Led is steady blue |
|
E-SKIMO is ON and connected to the smartphone APP. |
|
PowerPole UPGRADE state |
Led is blinking/steady violet |
|
E-SKIMO is ON, PowerPole is connected firmware is updating |
|
|
When the ski is ARMED any angle lever movement will activate the PowerTrain. ARM the ski only when your ski boots are connected and you are ready to start using E-SKIMO. Unwanted activation can cause harmful situations and damage to people and objects. Never touch PowerTrain and PowerBelt when the PowerPack is plugged in |

|
|
In DRIVE and POWER mode the Index button acts as a throttle. Any pressure will activate the PowerTrain. Unwanted activation can cause harmful situations and damage to people and objects. Never touch PowerTrain and PowerBelt when the PowerPack is plugged in |

Mode Definition
Single press any button and the Status LEDs will display the current operating mode for 30 seconds.
|
Mode |
Status LEDs |
Definition |
|
ECO |
|
Automatic step detection. |
|
CLIMB |
|
Automatic step detection. |
|
BOOST |
|
Automatic step detection. |
|
DRIVE |
|
Manual control. |
|
POWER |
|
Manual control. |
|
PAIRING |
|
Pairing to the E-SKIMO. |
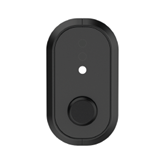
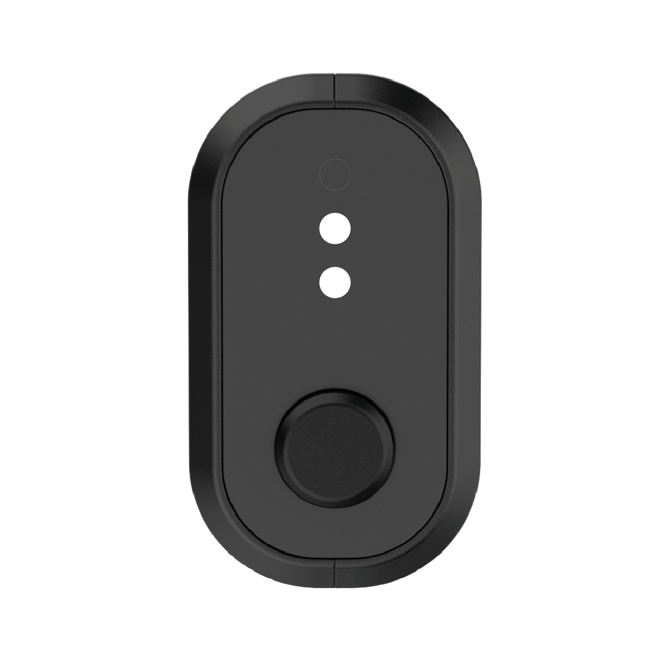
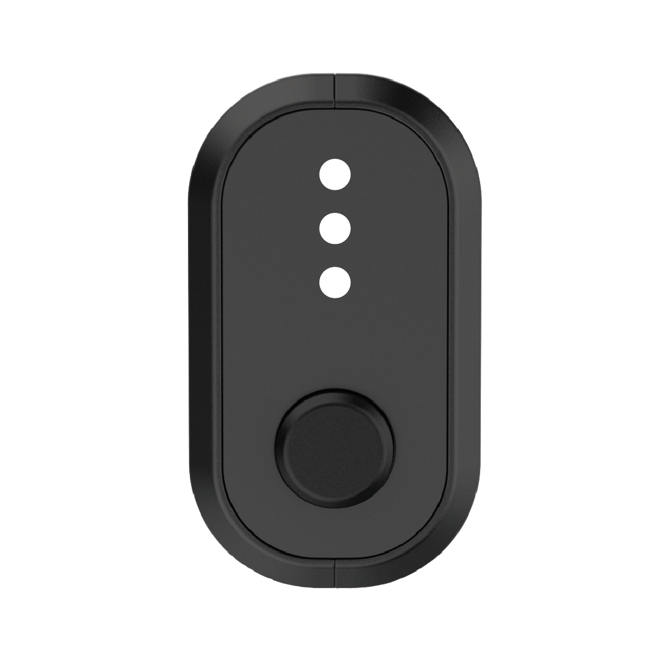
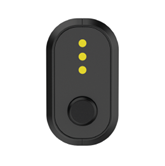
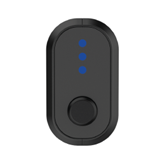
Mode selection via the PowerPole.
- Single-press the Power button to cycle between the drive modes
- Repeat the sequence on both PowerPoles.
Pairing the PowerPole with the E-SKIMO
All the E-Skimo devices are shipped with two pre-paired poles. Repeat the pairing process only if necessary.
If an already paired pole is set to painting mode it will lose the pairing settings.
- Install the PowerPack on the E-SKIMO, but make sure the E-SKIMO is turned off.
- Select Pairing mode using the following procedure:
- Turn on the PowerPole
- Select ECO mode
- Press and Keep pressed index button while pressing 5 times the action button
- The waving animation in blue color must be visible in the upper PowerPoles LEDs
- Turn on the E-SKIMO to pair with the PowerPole (this step may take up to 45 seconds).
- Repeat the steps to pair the other PowerPole with the other E-SKIMO.
- Repeat the sequence on both PowerPoles.
Arming the E-SKIMO
Once it is powered on, E-Skimo automatically disarms to prevent unwanted motor activiations. To arm the device, just follow the following procedure:
- While one of the automatic modes are selected (ECO, CLIMB, BOOST) complete two full steps to arm the device.
Steps that are too short will be discarded by the system to prevent loss of control.
Disarming the E-SKIMO
There are two ways to disarm your E-Skimo in order to prevent activation:
- Press both PowerPoles’ Index Buttons, this will immediately disarm the device
- Stop walking for 5 seconds
After a disarming procedure is performed, the motor will not activate until a new arming procedure.
Using the E-SKIMO
The E-SKIMO is designed to support your movement during ski touring without requiring additional actions from you.
To use E-SKIMO in one of the automatic modes, simply walk as you normally would during a ski touring ascent; E-SKIMO automatically detects your stride and provides proportional assistance based on your movement.
To use E-SKIMO in one of the manual modes, just use the Index button as a throttle while walking normally.
Kickturns
During turns and kickturns, it is recommended to press the Index button on the PowerPole to disarm the ski.
Disarming prevents the E-SKIMO from activating unintentionally while the skis are being rotated.
- Press the Index before starting the turn/kickturn.
- Release the button to resume normal assisted walking.
Once the button is released, E-Skimo automatically detect walking and re-arms to assists your stride as usual.
Emergency activation without PowerPole
In case of a discharged PowerPole battery, if the E-SKIMO ski is powered on and the user performs complete steps, the E-SKIMO will activate its Emergency Mode.
In this mode, the ski will automatically arm itself and activate the CLIMB mode. This allows the user to complete the outing safely and return to the starting point.
PowerPack Instructions
|
Features |
Description |
|
Balanced Charging |
During charging, the voltages of the Powerpack cells are automatically balanced. |
|
Overcharge Protection |
The Powerpack stops charging automatically once fully charged. |
|
Overcurrent Protection |
The Powerpack stops charging if an excess current is detected. |
|
Over-discharge Protection |
Discharging stops automatically to prevent excess discharge when in use. |
|
Short Circuit Protection |
The power supply is automatically cut if a short circuit is detected. |
|
|
Do not charge the Powerpack immediately after use. The Powerpack may be too hot or too cold. Allow it to return to room temperature for at least one hour before charging. Charging while the Powerpack is still out of temperature range can cause damage and is not covered under warranty. |

|
|
OPERATION BELOW -15°C (23°F): Although the minimum operating temperature is stated as -15°C, prolonged exposure to lower temperatures or Wind Chill factors may Index the Powerpack protection systems (Thermal Cut-off), causing the assistance to shut down unexpectedly. During stops or in extreme cold conditions, protect the PowerPack with thermal covers or chemical hand warmers (do not place directly in contact). Risk: A system shutdown on steep terrain requires the immediate management of a 6.7 kg ski without motor assistance. Plan your route with this risk in mind. |

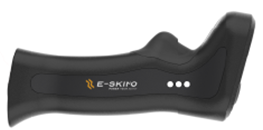
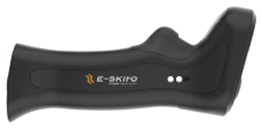
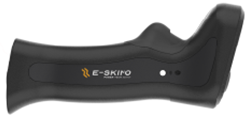
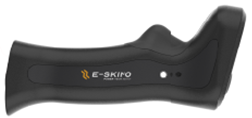
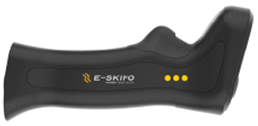
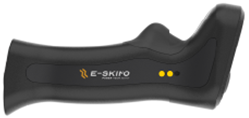
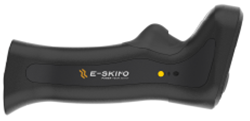
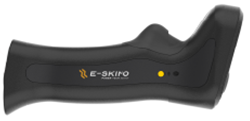
PowerPole status LEDs
When the PowerPole is on, press any button to activate the status LEDs:
- The side LEDs will display the PowerPole remaining battery capacity with white color
- The status LEDs will display the paired PowerPack remaining battery capacity with yellow color.
|
Status LEDs |
Description |
|
|
PowerPole battery capacity from 100 % to 60% |
|
|
PowerPole battery capacity from 60 % to 30% |
|
|
PowerPole battery capacity from 30% to 10% |
|
|
PowerPole battery capacity < 10 % (led blinking) |
|
|
PowerPack battery capacity from 100% to 60% |
|
|
PowerPack battery capacity from 60% to 30% |
|
|
PowerPack battery capacity from 30% to 10% |
|
|
PowerPack battery capacity < 10% (led blinking) |
Charge the PowerPole
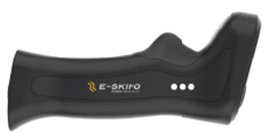
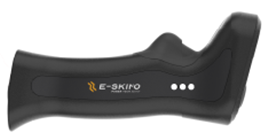
- Connect the SmartCharger to the PowerPole’s charging port.
- The side LEDs blink during the charging process and shut off when charging is complete.
|
Side LEDs |
Description |
|
|
Battery capacity 100 % |
|
|
Battery capacity form 60 % to 99 % (led blinking) |
|
|
Battery capacity from 30 % to 60 % (led blinking) |
|
|
Battery capacity from 0 % to 30 % (led blinking) |
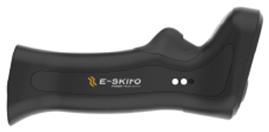
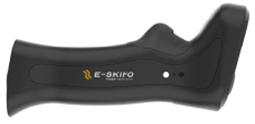
Charge the PowerPack
- Connect the PowerCharger to the PowerPack’s connector.
- The charger’s LED is red during the charging process and becomes green when charging is complete.
Downhill Configuration
|
|
The correct sequence for Downhill Configuration is critical. You must follow the steps in the exact order specified to ensure the E-SKIMO is configured safely and correctly for the descent. |

The downhill configuration requires removing and storing 8 distinct components (PowerPack, Belt, Train, Skin) and installing small parts (Tip & Tail Caps).
|
|
Dropping a component (especially the small Tip/Tail Caps) into deep fresh snow may render recovery impossible.
Skiing without Tip/Tail Caps exposes the pulleys to irreparable structural damage and snow infiltration that can compromise the integrity of the ski. |

Always perform the transition on a packed surface or use your open backpack laid on the ground as a safe "work area" to place disassembled components.
Disarming the E-SKIMO
There are two ways to disarm your E-Skimo in order to prevent activation:
- Press both PowerPoles’ Index Buttons, this will immediately disarm the device
- Stop walking for 5 seconds
In DRIVE or POWER mode, directly turn off the remote.
Clipping out
|
|
Do not use the PowerPole to press down the toe piece lever. It is critical to follow the steps to clip out of the binding. |

- Using gloves, press down on the toe piece lever to unlock the toe piece.
- Lift your toes and laterally rotate your boot to come out of the heel piece pins.
Remove PowerPack
- Lay the E-Skimo on the ground.
- Power off the E-SKIMO and the PowerPole.
- Pull up both flexible PowerPack’s straps.
- Place the PowerPack in its pouch.
- Store the pouch in the Thule Stir Alpine.
Remove PowerBelt
- Lay the E-SKIMO on its side.
- From the bottom of the ski, pull on the front of the PowerBelt and rotate it until the arrow end is in the middle.
- Hold each end with your index and thumb and unclip them.
- Pull on the arrow end until the PowerBelt is removed from the E-SKIMO.
- Store the PowerBelt in the Thule Stir Alpine.
Remove PowerTrain
- Lay the E-SKIMO on the ground.
- Open the PowerTrain’s latch.
- Slide the PowerTrain backwards and push the Tail cover down.
- Place the PowerTrain in its pouch.
- Store the pouch in the Thule Stir Alpine.
Remove Ascent Skin
- From the rear, peel the Ascent Skin from the E-SKIMO.
- Fold the Ascent Skin in half onto itself.
- Store the Ascent Skin in the Thule Stir Alpine.
Install Tip & Tail Caps
- Hold the E-SKIMO upright, with the tail resting on the ground.
- From the bottom of the E-SKIMO, push the pulleys into their grooves.
- Hold the caps so the Tip / Tail is readable.
- Insert the widest lip.
- Push on the bottom of the caps to secure them to the E-SKIMO.
Clipping in
- Rotate the heel piece by a half-turn so the horizontal pins point forward.
- Open the toe by pressing the lever down.
- Slide your boot forward and align the pins with the tip of your boot.
- Apply your weight on the toe to partially clip in.
- Apply your weight on the heel to fully clip in.
Repeat the steps for the second E-SKIMO and switch your boots to downhill mode.
Time to enjoy skiing down!
V. E-SKIMO Management
Emergency procedures
|
|
In the event of total battery depletion or E-SKIMO failure far from the return point, immediately switch to Downhill configuration and go back to the valley or nearest safe place.
Be aware that the ski in uphill configuration weighs 6.7 kg. Continuing the ascent without assistance will require significantly higher physical effort than standard ski touring. |

Transporting the E-SKIMO
To transport the pair of E-SKIMO, it is recommended to be in the downhill configuration with all components stored in the backpack.
If you must transport the E-SKIMO pair in uphill configuration, it is recommended to attach a PowerPole to each E-SKIMO using 2 ski straps. Then using the PowerPole as a handle for transport.
|
|
Do not lift or carry the ski by the soft TPU central tunnel or the angle lever. Doing so may cause permanent damage to the ski and compromise its safety. |

E-SKIMO APP
Pairing Your E-Skimo
|
To pair your E-Skimo for the first time, go to the Home screen and tap Pair now. The app will guide you through the pairing process. 26 |
|
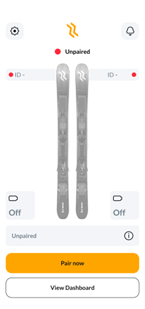
The app provides three pairing methods. You can choose the one that works best for your situation
|
Bluetooth List |
QR Code |
Serial ID |
|
Scan for nearby E-Skimo E-SKIMOs using your phone’s Bluetooth.Recommended when no other E-Skimo E-SKIMOs are active nearby. |
Scan the QR code printed on your E-Skimo to pair it instantly |
Enter the unique Serial ID printed on your E-SKIMO. |
|
|
|
|
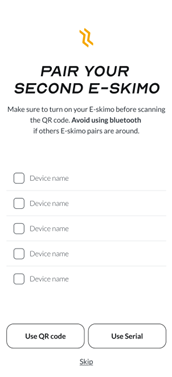
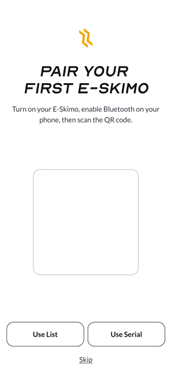

On-Screen Instructions
After selecting your preferred method, follow the on-screen instructions to complete the pairing of your first and second E-Skimo units.
Unpairing / Removing an E-Skimo E-SKIMO
|
|
You can unpair or remove an E-Skimo only as |

Unpairing and removing are part of the same workflow:
- The E-Skimo pair is disconnected from your phone.
- Synchronization between the two skis is deactivated.
- You can choose whether to keep or delete ownership.
How to Unpair or Remove an E-Skimo Pair
|
1 |
2 |
3 |
|
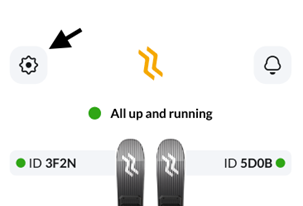
From the Home screen, tap the Settings icon in the top-left corner. |
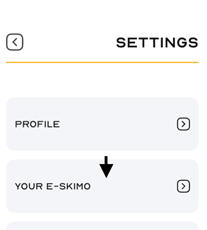
Select Your E-Skimo in the settings menu. |
Tap the Disconnect or Trashbin icon next to the E-Skimo pair you want to manage. |
|
|
|
|
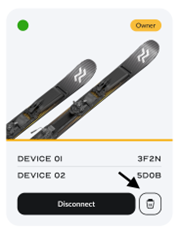
After tapping the trash icon, the app shows two options:
|
Remove from the list: The pair is unpaired and removed from your E-SKIMO list. Ownership is kept. Delete ownership: The pair is unpaired, removed from your list, and your ownership is revoked. Choose this only if you intend to transfer the skis to someone else. |
|
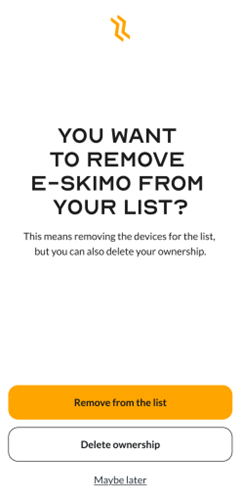
At the end of the process, a confirmation screen appears.
Sessions synchronization
Your E-Skimo E-SKIMOs require periodic synchronization with the server.
Synchronization allows the app to upload and analyze activity logs, usage statistics and operational data collected during your sessions.
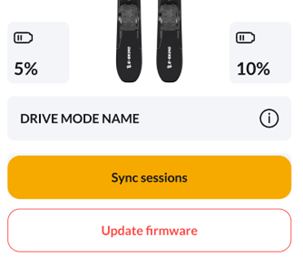
When the app detects pending data, the Home screen displays a “Needs synchronization” status and the “Sync sessions” button becomes available.
|
1 |
2 |
3 |
|
Tap Sync sessions when the button appears. |
The app starts transferring data to the server. |
Wait until the process reaches 100 percent; |
|
|
|
|


|
|
Do not close the app or turn off Bluetooth during synchronization. |

Once the upload is complete, the E-Skimo E-SKIMOs return to normal operation and the alert disappears.
Update
Your E-Skimo E-SKIMOs may require firmware updates to ensure optimal performance, improve stability and enable new features.
|
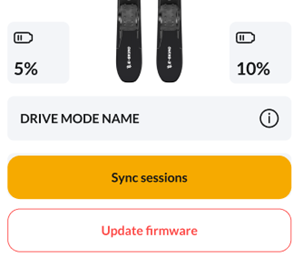
When a new firmware version is available, the Home screen shows an “Update firmware” button. The update button appears below the Sync sessions button. |
|
|
|
Before starting the update, make sure both E-Skimo units:
|

How to Update the Firmware
|
1 |
2 |
3 |
|
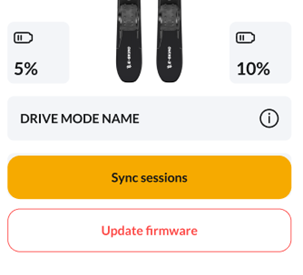
Tap Update firmware. |
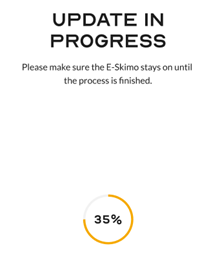
The app displays an Update in progress screen with a progress indicator |
Wait until the process reaches 100 percent; |
|
|
|
|

|
|
Do not close the app or move the E-SKIMOs too far from your phone during the process. |
|
If the update fails, the app shows an error screen. You can:
|
|
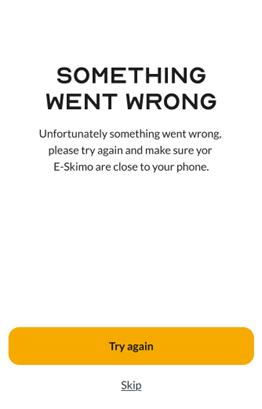
Occasionally, the update may include a firmware update for the PowerPole. After an update, turn on the PowerPole and bring it close to the powered-on E-SKIMO to initiate the update.
The update is in progress if both the PowerPole and E-SKIMO flash purple. If this does not occur, wait a few minutes and power off both devices (update not necessary).
|
|
Make sure the E-Skimo units remain close to your phone before retrying.. |
Adventures and activity stats
The Adventures section collects your recorded ski sessions and displays detailed statistics for each activity.
This data is generated after synchronization and allows you to review your performance and usage history over time.
Accessing Your Adventures
|
1 |
2 |
3 |
|
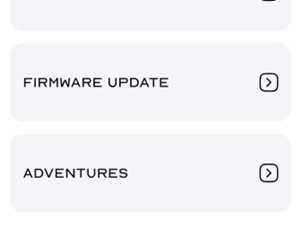
From the Settings menu, select Adventures |
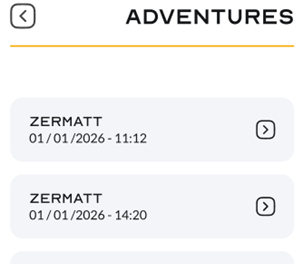
You will see a list of all recorded sessions, each showing location name, date and start time |
Tap any adventure to open its detailed statistics |
|
|
|
|
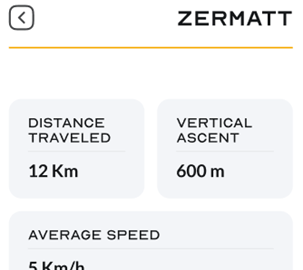
Adventure Details
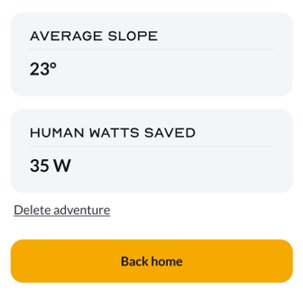
Each adventure provides a set of performance and usage metrics, including:
- Distance traveled
- Vertical ascent
- Average speed
- Battery usage (in Wh)
- Total time
- Average slope
These values help you review your activity and understand how you used your E-Skimo during the session.
Deleting an Adventure
If you want to remove a session:
|
1 |
2 |
3 |
|
Open the adventure you want to delete |
Tap Delete adventure |
A confirmation screen appears asking whether you want to proceed |
|
|
|
|

|
|
Deleted adventures cannot be recovered |

VI. Regular Maintenance
Ski base waxing
- The Tip and Tail Caps should be removed from the skis before waxing.
- The skis should be waxed according to the traditional guidelines used for standard skis, adjusting frequency and wax type based on snow temperature and expected usage.
|
|
Tip and Tail Caps should be cold waxed separately using a liquid wax dispenser. |

Cleaning
Body Structure, PowerTrain, and PowerBelt
Gently clean the exterior structure of the E-SKIMO E-SKIMO and its track system with a soft, wet cloth. For difficult-to-remove dirt, a toothbrush and mild soap or toothpaste can be used. Wipe clean with a wet cloth.
|
|
DO NOT clean the E-SKIMO with alcohol, acetone, gas, diesel, or other corrosive and volatile chemical solvents. These substances may damage the appearance and internal components. DO NOT wash the E-SKIMO with a power washer or high-pressure hose or expose it to pressurized or high-velocity water. DO NOT allow water to enter any charging ports or electronic connections during cleaning. |

VII. Storage and Disposal
Storage
During the off season, the ski base should be covered in a thick protective wax.
The Ascent Skin and the PowerBelt should be kept in a cold environment at all times.
The PowerPacks and the PowerPoles should be fully charged once every 3 months.
They shouldn't be left on the chargers for prolonged periods.
Disposal
- Follow the local regulations related to electronic E-SKIMOs when disposing of the E-SKIMO system.
- Dispose of the Powerpack packs in specific recycling containers only after a complete discharge. DO NOT dispose of the batteries in regular trash containers.
- Strictly follow the local regulations regarding the disposal and recycling of batteries.
VIII. Troubleshooting
Troubleshooting Guide
|
Problem |
Possible Cause |
Solution |
|
Ski does not activate |
PowerPack not connected or discharged |
Verify that the Powerpack is charged and connected (Ski LED should be on) |
|
Pairing issue |
Repeat the PowerPole pairing procedure |
|
|
Angle lever malfunction |
Verify that the angle lever is functional and moves correctly from 0° to 60° |
|
|
Ski boot not compatible |
Your ski boot may not be compatible with the automatic modes, you can only use E-SKIMO in manual mode |
|
|
Step is too short |
Your step is too short and does not activate the ski. Make longer steps. |
|
|
PowerTrain not communicating |
If your E-SKIMO build-in LED is blinking white, the PowerTrain is not communicating properly with the ski. In order to solve this issue, do the following steps: |
|
|
Ski does not arm |
Ski is off or Powerpack disconnected |
Verify that the Powerpack is charged and connected (Ski LED should be on) |
|
Pairing issue |
Repeat the PowerPole pairing procedure |
|
|
System error |
Power off and restart the E-SKIMO by removing and reconnecting the PowerPack |
|
|
Ski activates unintentionally |
Complex maneuvers detected as steps |
Press the Index button during kickturns or complex maneuvers to prevent activation |
|
Angle lever malfunction |
Verify that the angle lever is functional and moves correctly from 0° to 60° |
|
|
PowerPole does not turn on |
Battery depleted |
Charge the PowerPole using the SmartCharger |
|
Hardware issue |
Contact customer support |
|
|
PowerPack does not charge |
Powerpack too cold |
Wait until the Powerpack reaches a temperature above 0°C (32°F), then charge |
|
Hardware issue |
Contact customer support |
|
|
PowerBelt slips or derails |
Excess snow accumulation |
Clean the excess snow from the belt and pulleys |
|
Wet snow conditions |
Avoid using the E-SKIMO in excessively wet snow |
|
|
App does not find the skis |
Bluetooth disabled |
Enable Bluetooth on your smartphone |
|
Ski is off |
Verify that the ski is powered on |
|
|
Synchronization or firmware update fails |
Connection issue |
Restart both smartphone and E-SKIMO |
|
Ski is off |
Verify that the E-SKIMO is powered on |
|
|
Tip & Tail Caps difficult to install |
Ice accumulation |
Remove ice from the E-SKIMO before installing the caps |
|
Tip & Tail Caps difficult to remove |
Ice accumulation |
Remove ice and press on the dedicated release levers |
|
Ascent Skin - Excessive drag |
Snow accumulation under skin |
Remove snow buildup between the skin and the E-SKIMO |
|
Wet snow conditions |
Treat the skin as a standard ski touring skin; avoid excessively wet snow |
|
|
Bluetooth connection issues (PowerPole - Ski) |
Pairing lost |
Repeat the pairing procedure |
|
Low battery |
Verify that both E-SKIMO and PowerPole have sufficient battery |
|
|
Binding adjustment issues |
— |
Refer to the ATK binding manual for adjustment instructions |
Contact Support
If the issue persists or is not listed above:
- Use the Support button in the E-SKIMO App menu
- Contact us through the WEBSITE LINK
Find the latest troubleshooting guide at THIS LINK
IX. Compliance and Legal
General informations
FCC Certification
This E-SKIMO complies with Part 15 of the FCC Rules. Operation is subject to the following two conditions:
- This E-SKIMO may not cause harmful interference.
- This E-SKIMO must accept any interference received, including interference that may cause undesired operation.
Any changes or modifications not expressly approved by the party responsible for compliance could void the user’s authority to operate the equipment.
This equipment has been tested and found to comply with the limits for a Class B digital E-SKIMO, pursuant to Part 15 of the FCC Rules. These limits are designed to provide reasonable protection against harmful interference in a residential installation.
This equipment generates, uses and can radiate radio frequency energy and, if not installed and used in accordance with the instructions, may cause harmful interference to radio communications. There is no guarantee that interference will not occur in a particular installation. If this equipment does cause harmful interference to radio or television reception, the user is encouraged to try to correct the interference by one or more of the following measures:
- Reorient or relocate the receiving antenna.
- Increase the separation between the equipment and receiver.
- Connect the equipment to an outlet on a circuit different from that to which the receiver is connected.
- Consult the dealer or an experienced radio/TV technician for help.
FCC RF Radiation Exposure Statement
This equipment complies with FCC radiation exposure limits for an uncontrolled environment.
The E-SKIMO must be installed and operated with a minimum distance of 20 cm between the radiator and the user’s body.
The transmitter must not be co-located or operating in conjunction with any other antenna or transmitter.
FCC Caution
Any changes or modifications not expressly approved by the party responsible for compliance could void the user’s authority to operate this equipment.
European Union Compliance Statement (CE)
This E-SKIMO complies with the essential safety, health, and environmental protection requirements established by the European Union.
CE Declaration of Conformity
E-Skimo conforms to the following directives:
- RED Directive 2014/53/EU (Radio Equipment Directive)
- Low Voltage Directive 2014/35/EU
- EMC Directive 2014/30/EU
- RoHS Directive 2011/65/EU (Restriction of Hazardous Substances), as amended
- WEEE Directive 2012/19/EU (Waste Electrical and Electronic Equipment)
A full Declaration of Conformity is available upon request.
WEEE Disposal and Recycling Information
This product should not be disposed of with regular household waste throughout the EU.
To prevent potential harm to the environment or human health, recycle the E-SKIMO responsibly and promote the sustainable reuse of materials.
Use appropriate return and collection systems or contact the retailer where the product was purchased. They can ensure safe and environmentally compliant recycling.
Battery Recycling (EU)

Batteries or battery packaging are labeled according to Directive 2006/66/EC and amendment 2013/56/EU.
These labels indicate that batteries must be collected separately and recycled at the end of their life.
The battery may also include chemical symbols for metals involved (Pb for lead, Hg for mercury, Cd for cadmium).
Users must not dispose of batteries as unsorted municipal waste.
Please use appropriate collection facilities to reduce potential environmental and health risks associated with hazardous substances.
Before disposing of electrical or electronic equipment containing batteries, end users must remove the batteries for separate collection.
Restriction of Hazardous Substances (RoHS) Directive
This E-Skimo product, including all components such as cables and embedded electronics, meets the requirements of Directive 2011/65/EU on the restriction of certain hazardous substances in electrical and electronic equipment (“RoHS 2”).
Trademark and Legal Statement
E-SKIMO® is the flagship brand and registered trademark of E-Outdoor SA. All other names of products and brands appearing in this manual are trademarks or registered trademarks of their respective owner companies.
This Product and manual are copyrighted by E-Outdoor SA, with all rights reserved. No part of this product or manual shall be reproduced in any form without the prior written consent or authorization of E-Outdoor SA.
In compliance with laws and regulations, E-Outdoor SA reserves the right to the final interpretation of this document and all documents related to this product. This document is subject to changes (updates, revisions, or termination) without prior notice.
E-SKIMO is a product developed and manufactured by E-Outdoor S.A.
E-Outdoor S.A. shall not be held liable for any damage, injury, loss, or harm to persons, property, or animals arising from the use of the product, including but not limited to improper, incorrect, negligent, or unauthorized use.
Any use of the product that differs from the instructions, purposes, and procedures described in this manual shall be considered improper use.
The user assumes full responsibility for any consequences resulting from improper use of the product. E-Outdoor S.A. expressly disclaims any liability arising from such use, to the fullest extent permitted by applicable law.
Contact Information: Please visit the official E-SKIMO website to access the "Contact us" page or to view the latest product information, privacy policy, and legal agreements.
E-Outdoor SA Via Cantonal 41d CH 6565 SAN BERNARDINO Switzerland
Copyright © 2025 E-Outdoor SA. All Rights Reserved.